Madworks
MADWORKS - MAD High Quality Airbrush 0.5MM
MADWORKS - MAD High Quality Airbrush 0.5MM
Couldn't load pickup availability
MADWORKS - MAD High Quality Airbrush 0.5MM
TAKING CARE OF MAD AIRBRUSH:
https://www.youtube.com/watch?v=vO-LDKkpMY4
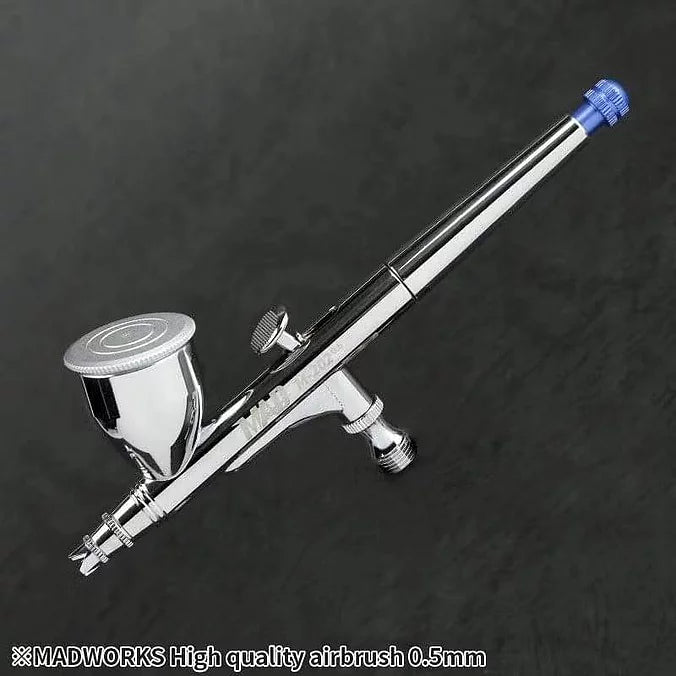
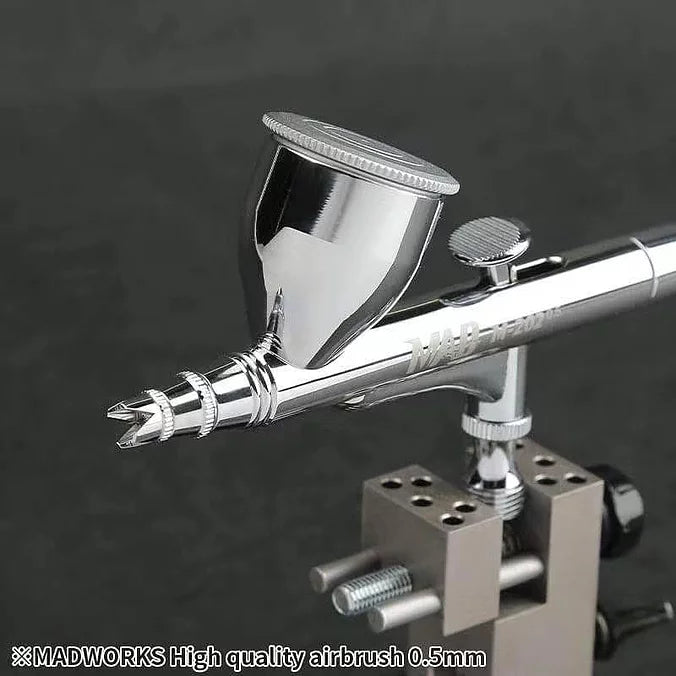
This is a dual action, 0.3mm airbrush. Perfect tool for most scale models. Affordable for beginner and also provides excellent quality even for experience users.
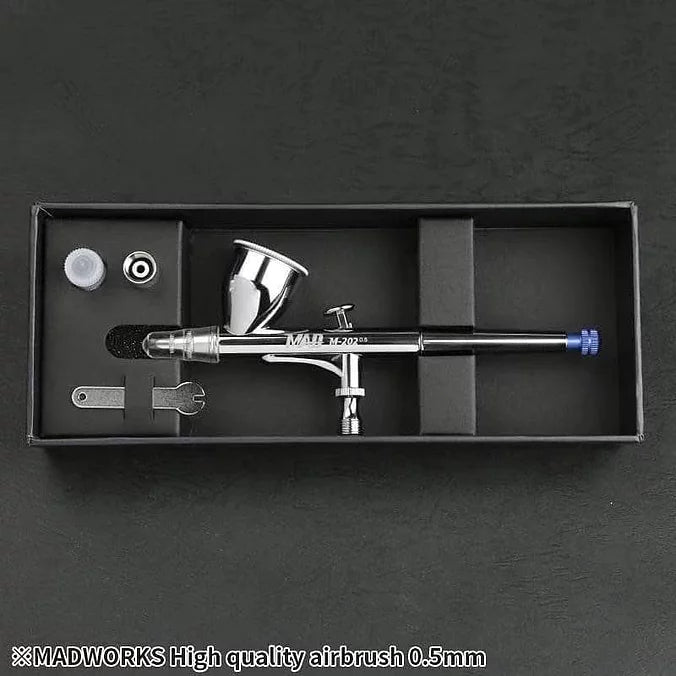
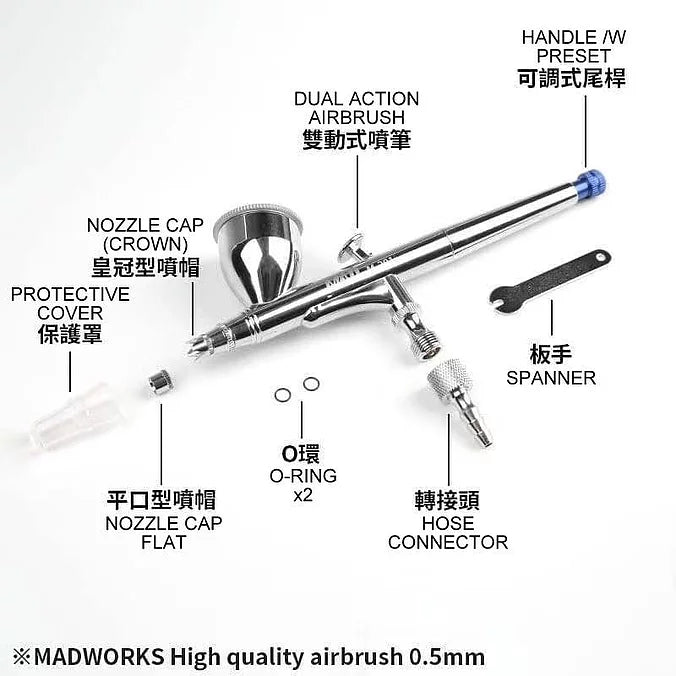
The airbrush is setup with a crown needle cap. A spare flat needle cap is included. Comes with two replacement o-rings for nozzle cap, a spanner (wrench), and an air hose connector.
The nozzle requires a sealant to prevent leakage.
Directions: CAUTIONS:
-
Do not remove the Nozzle (#3) unless absolutely necessary.
-
After each use, always empty any leftover paint and clean the airbrush. Use a proper thinner and a thinner-resistant nylon brush to remove any excess paint, repeat about 3-4 times. Back-flush the airbrush 1-2 times with the Needle Cap (#1A) attached. When the airbrush is clean, thinner should come out clear when spray.
-
To back-flush with the Crown Needle Cap (#1) attached, simply loosen the Nozzle Cap (#2) first. Do not detach the Nozzle Cap completely.
-
To clean the needle, unscrew both the Tail Cap (#17) and the Needle Stop Screw (#16). Now the needle can be carefully removed. Gently wipe the needle with a little thinner and a clean tissue. Reinsert the needle back into the airbrush carefully afterwards!
-
Exercise with extra caution. Damaging the needle may affect atomization and spray quality.
-
Do not soak the whole airbrush into thinner or tools cleaner.
-
Should clogging happen, rotate the nozzle counter-clockwise and detach it for cleaning. To ensure an air-tight seal, apply a nozzle sealant before reattaching the nozzle.
-
The MAD Airbrush Accessory Kit includes a Needle (#13), a Nozzle (#3), a sealant for the Nozzle (#3), a sealant for the Nozzle Cap (#2), and a lubricant for the Piston (#20). Purchase this accessory kit for proper maintenance of the MAD airbrush.
-
A nozzle sealant is necessary when putting the nozzle back into the airbrush. Secure the nozzle gently, DO NOT USE FORCE. Nozzle sealant usually dry in about 1 hour. Airbrush is operational afterwards.
-
If the nozzle is broken and is stuck in the airbrush, use the Nozzle Thread Extractor (available for purchase separately) to remove the broken thread. Alternatively, send the airbrush to the manufacturer for repair (service charge and shipping fee apply).
-
Even after regular general cleanings, a very small traces of paint may still left in the cup or on the needle. This may result in dried paints building up inside the nozzle. Every time after cleaning, leave a little bit clean thinner in the airbrush and put the cup’s lid on. After 12 hours, spray and empty all the thinner from the cup. This will effectively minimize the chance of the nozzle clogging, and therefore minimize the need to remove the nozzle for cleaning.
Notes:
0.2/0.3/0.5 describes the size of the airbrush nozzle. Smaller nozzles are suitable for finer details. Larger nozzles are suitable for a wider spray application. Using the right airbrush reduces the need to dissemble the airbrush for thorough cleanings; a general cleaning will be sufficient.
0.2 is suitable for: highlights and shadings, small lines, and fine details.
0.3 is suitable for: general use, even coats, and mist layers. Perfect for beginners.
0.5 is suitable for: large surface area, metallic paints (or paints with larger pigments), varnishes/protective coatings (harder when cured), primers (higher adhesion strength)
When using the same airbrush for different types of paints, it is important to properly clean the airbrush after each use. Paint residue left in the nozzle may turn into gunk or dried paints, clogging the airbrush as a result.
Paints not reduced to a proper consistency will affect the spray pattern. If the airbrush does not spray smoothly, take a look at the thinning ratio first. Testing with plain water or thinner is another way to help pin-point where the problem is.
When airbrushing at lower psi, especially with acrylic paints, it is easier for dried paints to buildup at the tip of the needle. Should tip-dry happen, simply do a quick cleanup before continuing.
📄 購物流程 & 常見問題
📄 購物流程 & 常見問題
📦 取貨方式
📦 取貨方式
交收方式:
✅ 葵芳葵涌廣場・格仔店取貨
✅ 旺角中心 格仔取貨
✅ 順豐到付(上門/智能櫃/便利店)
⚠️ 格仔店取貨注意事項:
1️⃣ 貨件尺寸不可大於 30cm x 60cm
2️⃣ 收到 WhatsApp 通知後,請於 5天內 取貨
🚚 寄貨時間說明:✅ 貨物一般於一星期內寄出,如貨量較多則可能延長至兩星期📦 順豐快遞於每星期一、二安排寄出,請耐心等候,感謝理解!✨
🚫荃灣西門市暫不開放🚫
Share